SVG to Slides › Docs › User's Guide › Snapping
Snapping
- SVG to Slides Chrome extension, version 1.3.0
Snapping pulls pen points and dragged points onto other points, the slide’s edges and centre, whole pixels, or a grid. The magnet button in the editor’s toolbar sets it. Points and pixels are on to start.
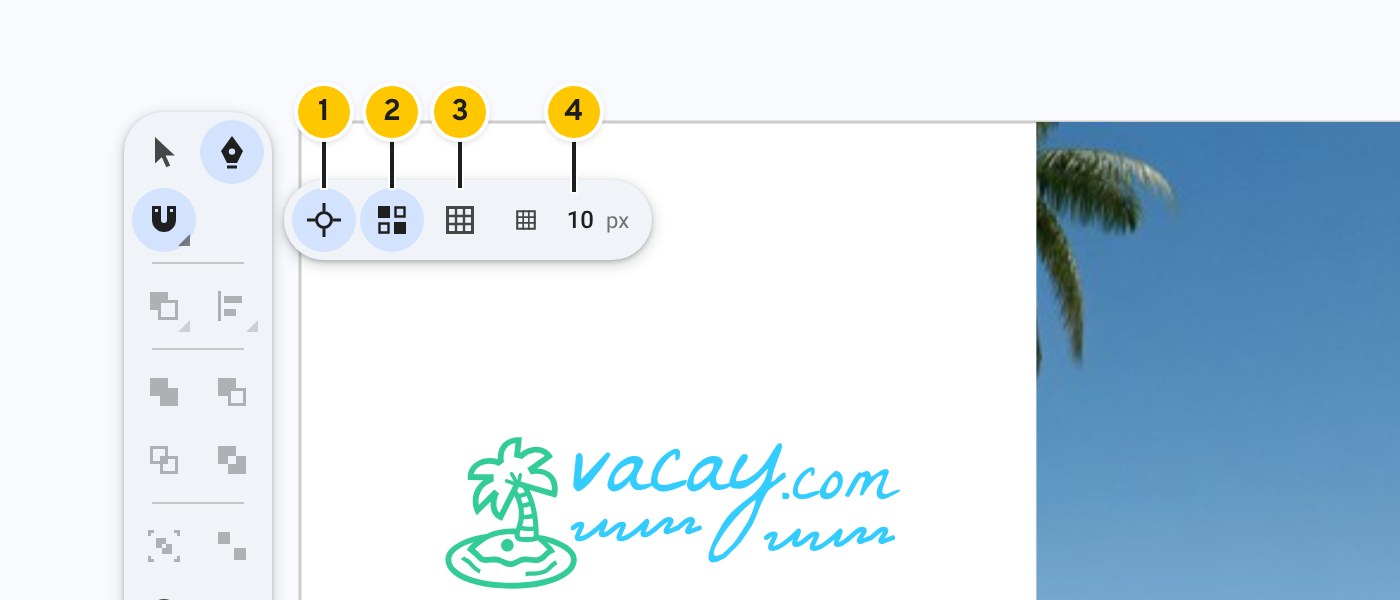
- 1Snap to points, the lines through them, and the slide’s edges and centre.
- 2Snap to whole pixels.
- 3Snap to the grid. Turning it on shows the grid.
- 4Grid size in pixels.
Snap to points#
A point being placed or dragged snaps to other points, to the horizontal and vertical lines through them, and to the slide’s edges and centre. Pink guides and a pink cross show what caught it. A point wins over the grid and pixels when it is within 6 screen pixels.
Snap to whole pixels#
Positions are rounded to whole pixels.
Snap to the grid#
The grid starts at the slide’s top-left corner. The size is 10 pixels to start. Type a size in the field to change it, which also turns the grid on. Press COMMAND+' to show or hide the grid. The grid is not drawn when its lines would be less than 6 pixels apart on screen.
What snaps#
- Pen points and their handles, and the dashed preview segment.
- Dragged points. The point you grab snaps and the rest of the selection follows.
- Dragged handles.
Turning snapping off for one move#
Hold COMMAND while placing or dragging to ignore snapping. SHIFT still keeps a move to 45° steps.
Where the settings are kept#
Snapping settings are kept on this computer. They are not part of the presentation.